

How To Take Amazing Travel Photos Using Your Smart Phone
/
Photo taken with iPhone 12 pro max - edited with snapseed & adobe photoshop - bryce canyon, utah
Vacation photos allow us to capture and preserve memories of our travels. Looking back on these photos can bring back feelings of nostalgia and help us relive the experiences we had while on vacation.
Sharing photos with friends and family allows us to share our experiences and adventures with others who may not have been able to travel with us. It's a great way to connect with loved ones and share the excitement of our travels.
Amazing vacation photos can inspire others to travel and explore new places. They can showcase the beauty and uniqueness of different destinations and encourage others to plan their own adventures.
Vacation photos can be more than just snapshots. With the right composition, lighting, and editing, they can become works of art that can be displayed in our homes or shared with others.
Taking photos on vacation can also help to boost creativity and inspire new ideas. Whether it's experimenting with different angles or trying out new techniques, photography can be a fun and creative outlet while on vacation.
How To Take Amazing Travel Photos Using Your Smart Phone
Focus on composition

Photo taken with iPhone 13 pro max - edited with snapseed - vacation island, san diego, california
Use the rule of thirds, leading lines, and symmetry to create well-composed photos. Here are some tips to help you focus on composition when taking photos with your smart phone:
1. Rule of thirds: Imagine a 3x3 grid overlaid on your screen and place your subject at one of the intersections. This creates a more visually interesting composition than placing the subject in the center.
2. Symmetry: If you have a symmetrical subject, such as a building or a tree, center it in the frame to create balance in the composition.
3. Leading lines: Use lines such as roads, fences, or buildings to draw the viewer's eye towards the subject.
4. Framing: Use natural or man-made objects such as doors, windows, or foliage to frame the subject and add depth to the photo.
5. Contrast: Look for contrasting colors or textures to create visual interest and make your subject stand out.
6. Depth of field: Use the portrait mode or selective focus feature on your smartphone to blur the background and make the subject stand out.
7. Experiment: Don't be afraid to try different angles and perspectives to find the best composition for your subject.
Composition is all about creating a visually interesting and balanced photo. Practice these tips and you will start to develop your own style and eye for composition.
Look for interesting perspectives

Photo taken with iPhone 6 - edited with snapseed & histamatic - trinity center, california
Capture unique angles and viewpoints by shooting from different heights and angles. Here are some tips to help you create interesting perspective when taking photos with your smart phone:
1. Change your angle: Experiment with different angles such as shooting from a low or high angle to create a unique perspective.
2. Use leading lines: Look for lines such as roads, fences, or buildings to draw the viewer's eye towards the subject and create depth.
3. Play with symmetry: Use symmetry to create a sense of balance and interest in the photo. Symmetrical objects can be especially effective when shot from an unusual angle.
4. Get close: Move in close to your subject to create a sense of intimacy and emphasize its details.
5. Look up: Shooting up at a subject such as a tall building or a tree can create a sense of grandeur and make the subject appear larger than life.
6. Use reflections: Reflections can create a sense of symmetry and add interest to a photo. Look for reflections in water or shiny surfaces.
7. Play with depth of field: Use the portrait mode or selective focus feature on your smartphone to blur the background and make the subject stand out.
Perspective is all about creating a unique and interesting view of the world. Experiment with different angles and techniques to find the best way to capture the subject.
Use natural light

PHOTO TAKEN WITH IPHONE 12 PRO MAX - EDITED WITH SNAPSEED - dana point, california
The best time to take photos is during the golden hour, which is an hour after sunrise or an hour before sunset. Use the light to your advantage to create warm and flattering photos. Here are some tips to use natural light when taking photos with your smart phone:
1. Use the right time of day: The best time to take photos with natural light is during the golden hour, which is the first hour after sunrise and the last hour before sunset. During this time, the light is soft, warm, and diffused, which is perfect for taking photos.
2. Avoid harsh light: Harsh light can create harsh shadows and blow out highlights, which can ruin a photo. Try to avoid shooting in direct sunlight and instead look for areas with diffused light such as under a tree or a shaded area.
3. Use the right exposure: Smartphones often have an automatic exposure setting, but sometimes it might not work as expected. In such cases, tap on the area you want to focus on and adjust the exposure manually.
4. Look for interesting light sources: Natural light can come from many different sources such as the sun, the moon, and even reflections. Look for interesting light sources to create unique and captivating photos.
5. Use light to create mood: The way light falls on a subject can create a mood or atmosphere in a photo. For example, soft and warm light can create a romantic mood, while cold and harsh light can create tension or drama.
6. Use shadows creatively: Shadows can also create visual interest in a photo. Use them to create patterns, contrast or even as the main subject.
Natural light is a free and readily available resource that can make your photos stand out. Experiment with different lighting situations and techniques to find the best way to capture the subject.
Use the HDR mode

Photo taken with iPhone 12 pro max - edited with snapseed - the nevada high sierras
This feature on your phone camera allows you to capture a wider range of colors and details in bright or low-light settings. Here are the steps to use the HDR mode when taking photos with your smart phone:
1. Turn on HDR mode: Open your camera app and find the HDR mode option. It may be located in the settings or on the main camera screen.
2. Keep your camera steady: HDR mode takes multiple photos with different exposures and merges them together to create one image. Keep your camera steady to avoid blurry photos.
3. Use HDR in high-contrast situations: HDR mode is best used in high-contrast situations where there is a lot of difference between the bright and dark areas of the photo. This can include landscapes with bright skies and dark shadows, or indoor photos with bright windows.
4. Avoid using HDR in low-light situations: HDR mode can create noise in low-light situations, so it's best to avoid using it in these conditions.
5. Be patient: HDR mode takes a few seconds to capture and process the multiple photos, so be patient and hold the camera steady until the process is complete.
6. Edit your photo: After taking a photo in HDR mode, you may want to edit it to adjust the brightness, contrast, and saturation levels.
HDR mode can be a useful tool in high-contrast situations, but it's not always necessary for every photo. Experiment with different settings and techniques to find the best way to capture the subject.
Turn off the flash

Photo taken with iPhone 12 pro max - edited with snapseed
The flash on your smart phone can wash out the colors and create harsh shadows. Instead, use natural light or a small LED light. Here are the reasons why you should turn off the flash when taking photos with your smart phone:
1. Flash can create harsh lighting: The flash on a smartphone can create harsh lighting that can wash out the subject and create unflattering shadows. It can make the photo appear unnatural and unappealing.
2. Flash can create red-eye: The flash on a smartphone can cause red-eye in people and pets, which can be difficult to fix in post-processing.
3. Flash can drain your battery: Using the flash on your smartphone can quickly drain your battery, especially if you are taking multiple photos.
4. Natural light is often better: Natural light provides a more flattering and softer lighting that can make the subject appear more natural and appealing. With the right natural lighting, you can capture more details and colors in your photos.
5. Low light photos can be improved without flash: Smartphones have advanced camera technology that can take better low light photos without using the flash. You can adjust the ISO and shutter speed, or use the night mode feature to capture better low light photos.
Turning off the flash can help you capture more natural and appealing photos. Experiment with different lighting conditions and techniques to find the best way to capture the subject.
Experiment with filters

Photo taken with iPhone 12 pro max - edited with snapseed
Many camera apps offer various filters and effects that can help enhance the mood and atmosphere of your photos. Here are the steps to use camera filters when taking photos with a smart phone:
1. Open your camera app: Open your camera app and find the filter icon. It may be located in the camera settings or on the main camera screen.
2. Choose a filter: Choose a filter that best suits the mood or atmosphere you want to create in your photo. There are various filters available such as black and white, sepia, vintage, and more.
3. Adjust the filter strength: Most camera apps allow you to adjust the strength of the filter. You can slide the filter bar to increase or decrease the strength of the filter.
4. Experiment with different filters: Experiment with different filters to find the best one that suits your photo. Some filters work better with certain types of photos than others.
5. Use filters to enhance your photo: Filters can enhance your photo and bring out the best in your subject. They can also help to create a unique and interesting perspective that can make your photo stand out.
6. Edit your photo: After applying a filter, you may want to edit your photo further to adjust the brightness, contrast, and saturation levels.
Camera filters can be a fun and creative way to enhance your photos. Experiment with different filters and techniques to find the best way to capture the subject.
Edit your photos

Photo taken with iPhone 13 pro max - edited with snapseed
Don't be afraid to edit your photos to enhance the colors, brightness, and sharpness. Here are the steps you can follow to edit photos using Snapseed:
1. Download Snapseed from your app store.
2. Launch the app and select the photo you want to edit.
3. Tap on the Tools icon at the bottom of the screen.
4. You will now see a list of editing options such as Tune Image, Crop, Perspective, and more.
5. Tap on the tool that you want to use and adjust the settings to your desired effect.
6. You can also use the brush tool to selectively edit parts of the image.
7. Once you are done editing, tap on the checkmark icon to save your changes.
8. You can now share your edited photo on social media or save it to your device.
Remember, practice makes perfect. Experiment with different editing tools and settings to find the perfect look for your photos.
Use the panorama mode

Photo taken with One plus 7 - edited with snapseed & adobe photoshop
This feature is ideal for capturing wide landscapes or cityscapes. Here are the steps to use the panorama mode when taking photos using your smart phone:
1. Open your camera app: Open your camera app and find the panorama mode. It may be located in the camera settings or on the main camera screen.
2. Choose your direction: Decide on the direction you want to take the panorama photo. You can choose to sweep the camera from left to right or from right to left.
3. Hold your phone steady: Hold your phone steady and start taking the panorama photo. Keep the camera level and move it slowly in a smooth and steady motion.
4. Keep the target in the same spot: Keep the target you want to capture in the same spot as you move the camera to create a seamless panorama photo.
5. Watch the progress: Watch the progress of the panorama photo as you take it. Make sure there are no gaps or overlaps in the photo.
6. Edit your photo: After taking the panorama photo, you may want to edit it to adjust the brightness, contrast, and saturation levels.
Panorama mode can be a fun and creative way to capture scenic views or large groups of people. Experiment with different directions and techniques to find the best way to capture the subject.
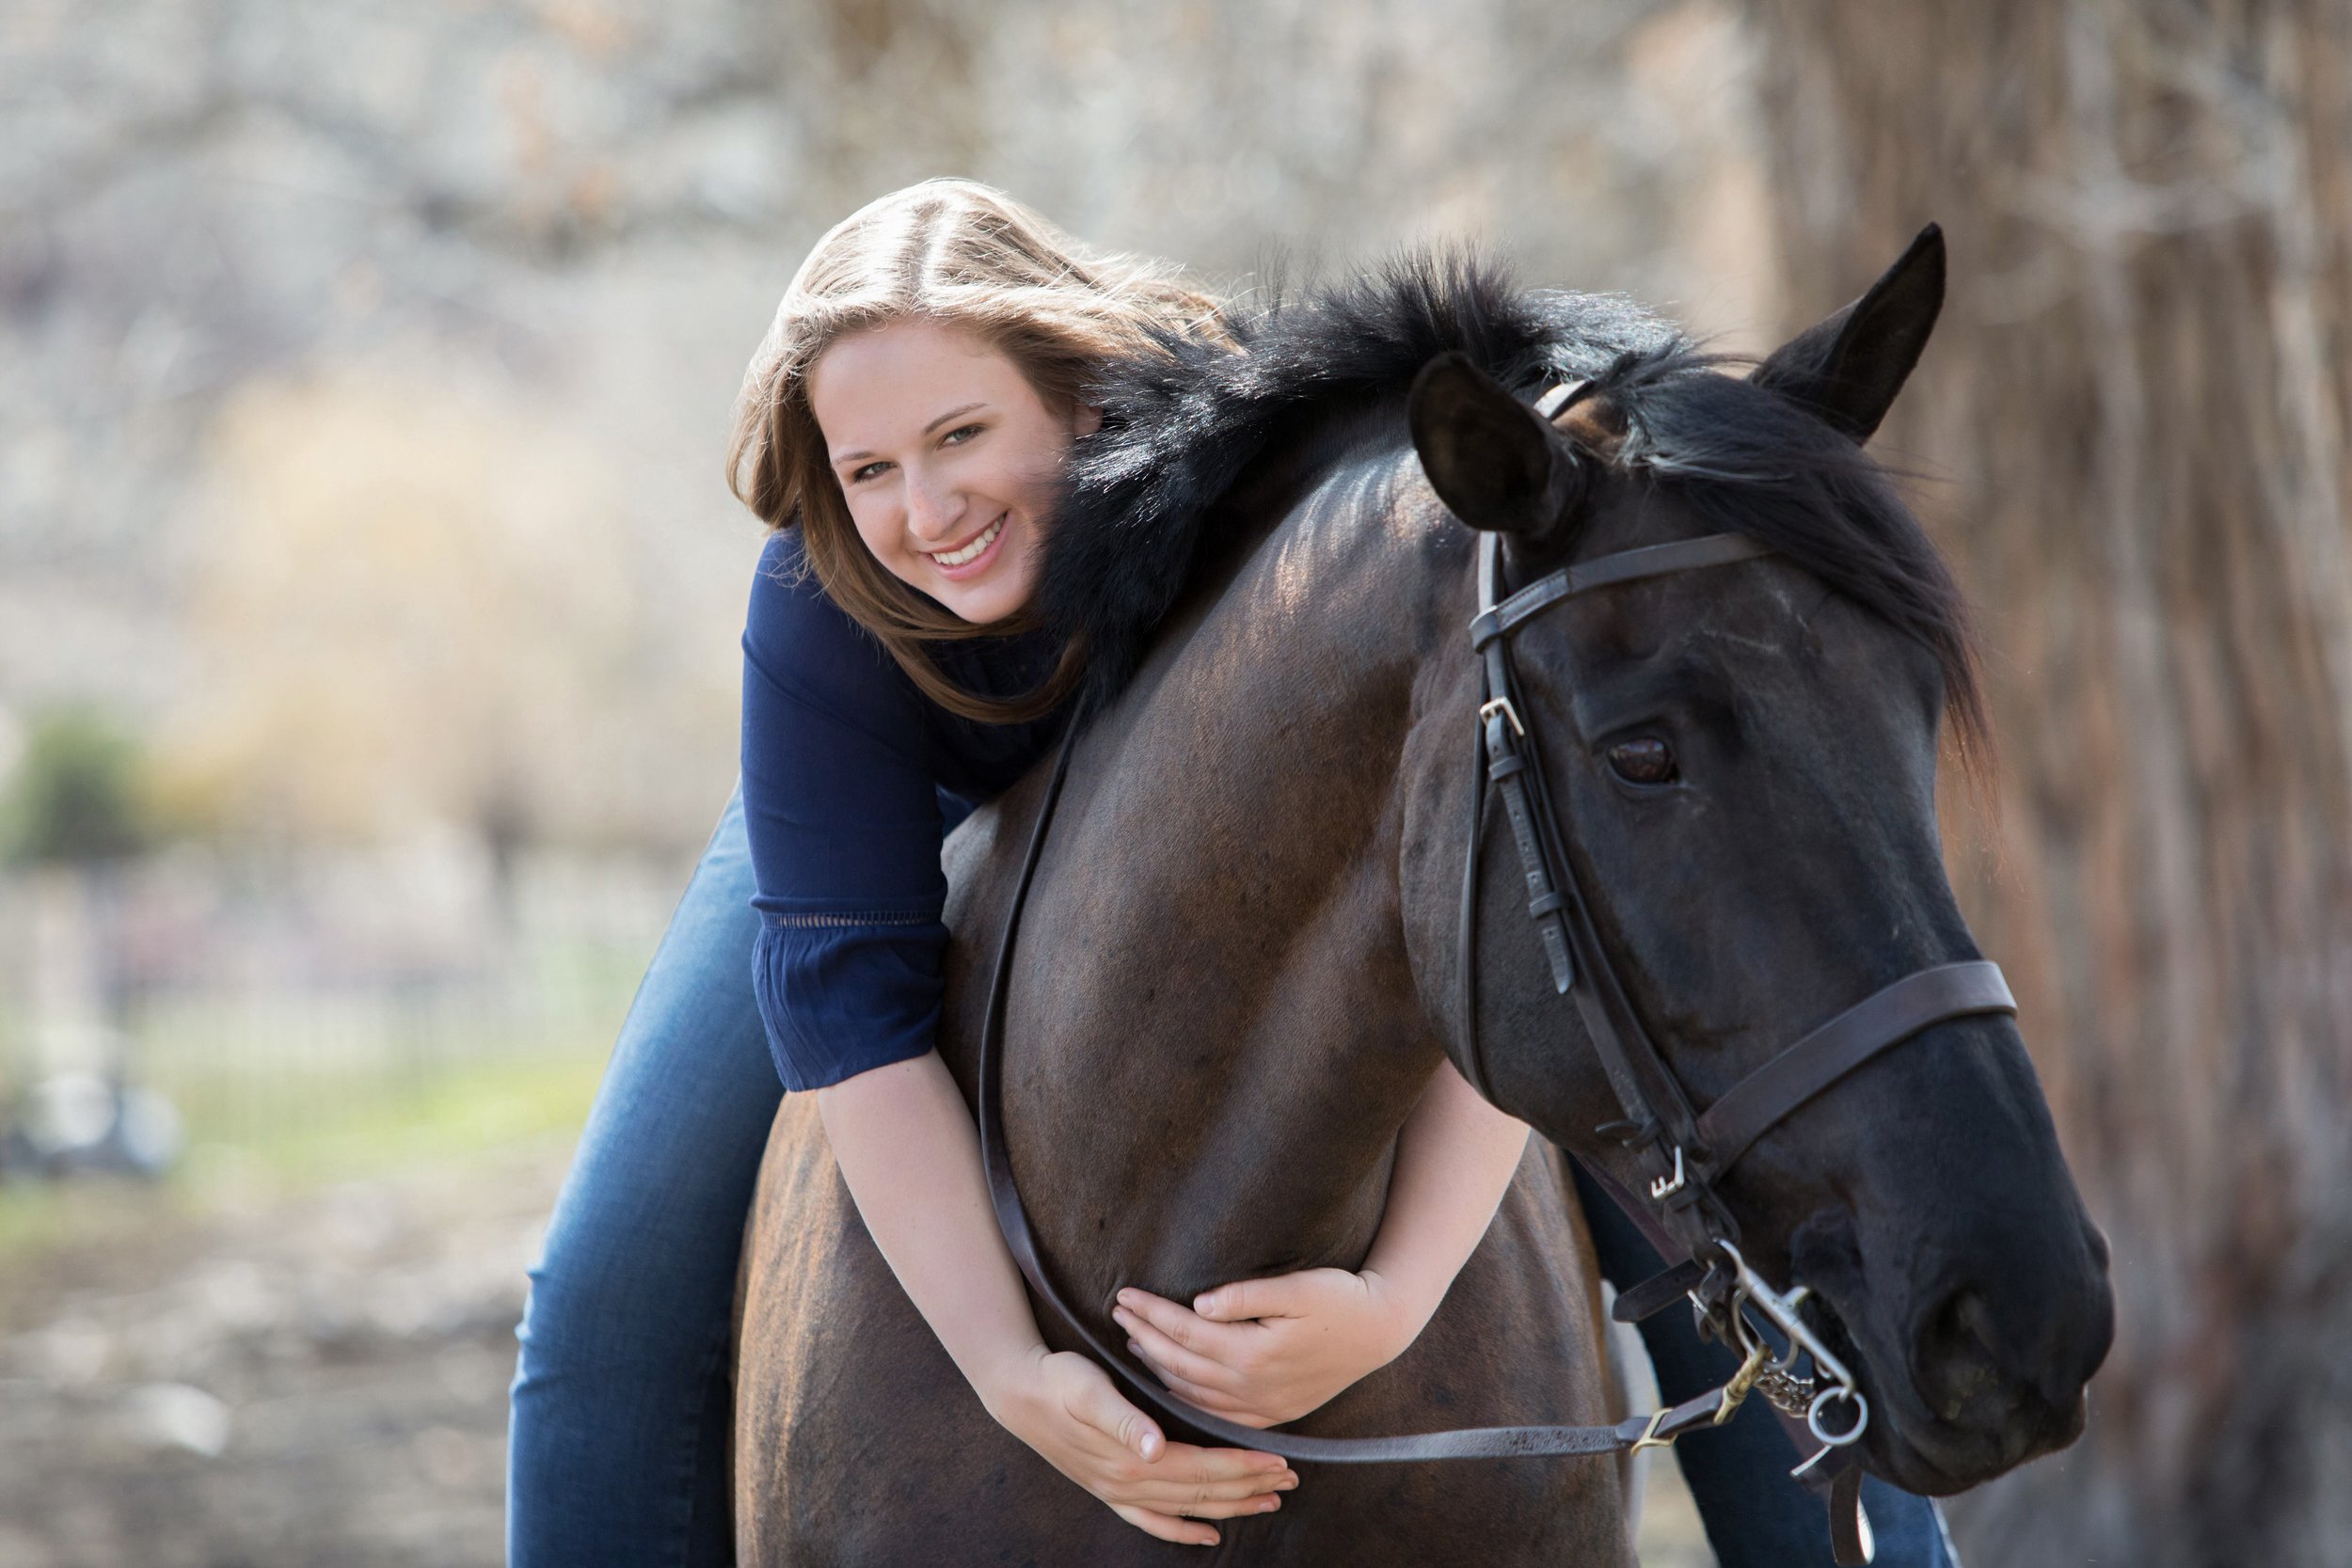
Use the portrait mode

Photo taken with iPhone 13 pro max - edited with adobe photoshop
This feature creates a blurred background effect and highlights the subject, making it ideal for capturing portraits or close-up shots. Here are the steps to use the portrait mode when taking photos with your smart phone:
1. Open your camera app: Open your camera app and find the portrait mode. It may be located in the camera settings or on the main camera screen.
2. Find a subject: Find a subject that you want to photograph. Portrait mode works best for photographing people or animals.
3. Keep a proper distance: Position yourself at a proper distance from the subject. The camera will guide you on how far you should be from the subject.
4. Focus on the subject: The camera will automatically focus on the subject and blur the background. Make sure the subject is in focus before taking the photo.
5. Check the lighting: Portrait mode works best in good lighting conditions. Make sure the lighting is sufficient and avoid harsh shadows on the subject.
6. Take the photo: Take the photo by pressing the shutter button. The camera will automatically apply the portrait effect to the photo.
7. Edit your photo: After taking the portrait photo, you may want to edit it to adjust the brightness, contrast, and saturation levels.
Portrait mode can be a great way to capture stunning photos of people or animals. Experiment with different lighting conditions and techniques to find the best way to capture the subject.
Finally, don't forget to enjoy the moment
Sometimes, the best travel photos come from spontaneous and unexpected moments. So, put down your phone and enjoy the scenery and experiences around you.


Hey there—I’m Val Westover of Val Westover Photography, and if you’re a Reno high school senior getting ready for those milestone high school senior photos…